Tuesday, September 28, 2010

Colour-mixing for kids & the best homemade playdough ever!

Well, maybe not ever, but at least the best I've come up with in years of making playdough for the kids. This particular recipe is really easy yields a moist, pliable, long-lasting dough that my kids love playing with. You don't even need to cook it, so it's kid-friendly to make, too.

He added the colour and did the kneading himself

FYI, that's a self-sculpture he's presenting
Anyway, here's the recipe. It's a winner!

PLAYDOUGH 
1 c. flour
1 c. boiling water
2 tbsp. cream of tartar
1/2 c. salt
1 tbsp. oil
Food col
oring 

Mix and knead together in a bowl. That's it! So fast I feel the need to turn the addition of food colouring into a lesson in colour mixing for my three year old whenever we make it together. Here are some easy combos for kids to remember, using basic food colour options:

blue+green=turquoise (pictured)
blue+red = purple
red+yellow=orange
yellow+blue=green

I also have a little colour wheel that we bring out to look at primary, secondary and tertiary colours. Not sure how much my oldest is learning from the wheel, but it makes my day to hear him try to pronounce 'tertiary'.

Linked to:


Monday, September 27, 2010

KCWC -- days 4,5, 6 & 7

I was determined to make more pants for my boys during the tail end of Elsie Marley's fall edition of the Kids' Clothing Week Challenge, but other projects took over. To my credit, I did purchase some denim and corduroy fabric to make pants, but it still has to be washed before I make anything with it.

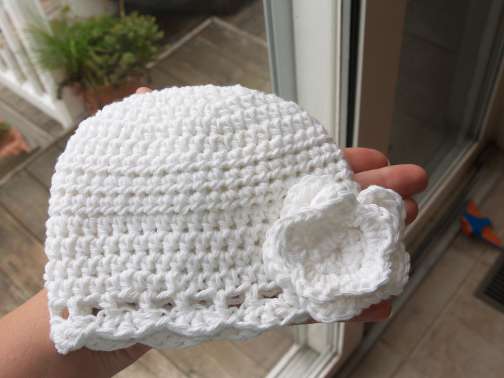
The sewing that I did do was a mish mash of things that had to be done (like finishing altering a flower girl dress -- no photo), and fun projects, like a baby kimono (pattern courtesy of Amy @ Habitual -- great site if you haven't visited), some (ten!) superhero capes, and knitting part of a blanket for a soon-to-arrive baby. I know a blanket isn't technically clothing, and knitting isn't technically sewing, but  I still have a lot of work to do on it, and not enough time, so I'm counting it. Some pics:

Simple design - 25 50 stitch x 50 row blocks, alternating colours

These still need some cool lightening bolt appliques!

Not happy with the binding on this. Needs pressing.

On the kid craft front, the boys and I invited some little friends over and made slime this morning. There weren't any major casualties, but in the future, I'd reserve this as a group activity only when the adult-child ratio is 1:1. Regardless, my boys LOVED the slime. Yep, even hubby, who spent at least an hour playing with the sample slime I made last night in preparation for today's playdate. Great entertainment for the kids, but it does contain Borax, so best to supervise closely so that no one mistakes it for Jello. I recently saw this project on a blog (can't remember which one -- ergh), that linked to this YouTube video with the 'recipe'. We used clear glue instead of white, and next time, I'm going to add some glow-in-the-dark gel. Really hope that works!


And finally, I made a really, really yummy banana cake yesterday. The recipe is from Recipe Zaar, and it's no fail. Oh, and absolutely decandent. I reduced the icing sugar in the frosting to 2 cups (down from the called for 3.5 cups) so it wasn't too sweet for my boys, but it'd be awesome with the full amount, too! This one is a caloric nightmare, so don't even check the link if you're on a diet. It's bad, bad news, all wrapped up in a really tasty package. Again, no photo of the cake (just a gratuitous kid shot) -- I served it at this morning's playdate, and, well,  like I said, really tasty package  (=

This batter-covered face adds to my joy of baking!

Thursday, September 23, 2010

KCWC-- days 1,2 & 3

My projects for Kids Clothing Week have been small and simple so far, but I have enjoyed the push to get back to my sewing room.

Day one resulted in some much-need cozy loungers for my oldest son. The print isn't fantastic, but it's soft and warm, AND, he likes it (probably because it's the same print I used to make his little brother's sleep sack).

My son's waist is small, but his legs are long.

Day two saw the completion of this little hooded vest, perfect for these cool-but-not-cold fall days, especially at the playground. I considered adding some sort of dinosaur or rocket applique, but Josh said no. Like most three year olds, he's rather opinionated. So, plain it is, until this afternoon or tomorrow or next week when he inevitably changes his mind (=

Oops, forgot to clip threads!

See how store-bought pants always fall down?

Day three was limited to planning and cutting thanks to some electrical blips that prompted me to unplug my machines. Tonight should be better, although I may be working on a baby quilt instead of actual clothing. We'll see if I can squeeze in both.

Monday, September 20, 2010

Pantry reveal!

So a couple days back, I posted a photo of my oh-so-packed pantry. It was in shambles. Everything was everywhere, I had to waste time digging around for things that should have been in plain sight, and the shelves were so overloaded that they were breaking. Here's a little reminder shot.

Cue scary music!

Fast forward to today, and ta-da! My new and improved pantry!

That's an empty shelf on the bottom!


View behind the door -- appliances, cans, baggies, etc

Solid now

I intended to paint some sort of stencil on the back walls, but it's just not a priority right now. Until I have more free time, I'll settle for organized. I purchased the glass jars (two sizes, the little ones on sale) at Walmart and used them for dry goods. I had the cereal containers in the pantry before, but now they're on a lower shelf and accessible to the kids. We'll see if that lasts. The only other purchase I made was a set of four dollar store bins. I used one for infrequently used baking items (candied ginger, carob powder, and so on) , one for frequently used baking items (vanilla, baking powder, cupcake liners, toffee bits, etc), one for extra or half-full pasta/grain bags, and one for 'drinkables' (tea bags, instant coffee, Crystal Light, Koolaid). I thought four would be enough, but I really could have used another one or two, and may pick up more later.

This re-org came in the nick of time, as the shelves were on the verge of collapse. Seriously, the previous owner had the shelves attached to the supports by finishing nails, and the angled support at the bottom wasn't even attached to the wall. I had loaded the shelves assuming they were secure, but if these things had collapsed when one of my kids was in there rooting for crackers, it could have resulted in serious injuries. Hubby ripped out the angled supports and hand cut niches in 2x4s (I'll be painting these eventually) to create solid vertical supports. Thanks, Love!

Speaking of my dearest, he broke into my newly acquired stash of wine corks and, along with our boys, created these little guys:


Two corks down, only a bajillion to go!

I'm off to do my hour of sewing for the Kids Clothing Week Challenge!

FALLCLEANING


Visit thecsiproject.com

Sunday, September 19, 2010

Kids clothes week challenge -- the fall edition!

It's back! The Kids Clothes Week Challenge is on again at Elsie Marley. I semi-participated in the spring event, and it was a good kick in the pants, even if I didn't get much done.


The idea behind the challenge is to spend one hour a day sewing (or knitting/crocheting) kids clothing pieces. The challenge starts tomorrow, so I better get planning. Oh who am I kidding; my kids need pants or they'll be wearing floods all fall/winter.

Pantry update: I've removed about 1/3 of the items in my pantry. HUGE job. The challenge now is to keep my kids from pillaging/breaking the stuff that's now sitting in my dining room, waiting for its new home, while the rest of it comes out and the shelf repaired. The shelf break I mentioned is more serious that I thought, so this re-org project comes in the nick of time!

Friday, September 17, 2010

Spice drawer re-do

Blogland is full of amazing pantry projects lately. I drool over each make-over, but realistically, they're way out of my league, organization-wise. However, I am inspired and decided tonight to take the plunge and upgrade...my spice drawer. Baby steps!

So, three-and-a-half boxes of canning jars and a ridiculous number of sneezes later, my spice drawer has gone from this:

(for shame!)

to this:

(love!)

This was the easiest project ever. Buy several boxes of 250 ml jars, fill them with the mess of spices already in my drawer, and label them with marker on top. Oh, and I alphabetized them and added a drawer liner! How positively Martha Stewart of me! I may go all out and make cute printed labels, but for now, the marker works just fine.

Now that I'm feeling brave and victorious, here's the big disaster I call a pantry:


Notice the top shelf is breaking away from its supports under the tremendous weight of all the flour and other junk essentials I have stashed up there, and the odds and ends that have been squeezed off the shelves ad onto the floor. I'm not sure when I'm going to have time to attack this, but now that I've posted this photo, I feel mortified enough honour-bound to make sure it happens.


FALLCLEANING


Visit thecsiproject.com

Tuesday, September 14, 2010

Cloche, corks & cars

I've been feeling scattered this week, and not terribly motivated to craft. I have a lot of to-do items hanging over my head right now, and that always plays into a halt on creativity. One little project did get started and completed, so hopefully I'll get more done the rest of this week.


Several of the moms in my playgroup are about to give birth to second, third and fourth children. I always like to make at least a little something for the new babe, even if it makes me a smidgen sad because I probably won't be having more children of my own. This little cloche hat from Aesthetic Nest came together pretty quickly. I like the flower detail a lot.


This bag of corky goodness was a free find on Kijiji. I admit I didn't think there would be this many corks (that is an industrial size garbage bag, about 30 inches across on the bottom!), so I think I'll be making a cork wreath or two in addition to the trivets I had originally planned on making. So far, my kids haven't spilled the bag. Fingers crossed for that little miracle to continue.


And finally, my ongoing quest to get my kids to eat resulted in this little sloppyjoe race car for lunch. I was browsing a really adorable blog called Making Memories with your Kids, when my son looked over my shoulder and noticed a photo of a similar 'race car sandwich' (as he called it). He was excited and so we made one. He still didn't eat more than a couple very small bites, but it was nice to see him excited by at least the idea of food.

Have a great Tuesday! This evening I'm off to a friend's house to sit and gab while we all work on different lap crafts.

Linked to:

Keeping It Simple

Friday, September 10, 2010

Monster applique

My kids grew like weeds over the summer, so they need new clothes. Pants, specifically. The situation isn't dire for the youngest one (other than PJ bottoms, and I'm slowly making those), but my oldest son is such a stringbean that it's rare to find store-bought pants that fit both his long legs and ridiculously skinny waist. His diaper used to be our primary pants-keeper-upper, but now that he's potty trained, his pants are always falling down.

So, with that need in mind, last night I added...a shirt to his wardrobe. Sigh. Apparently, I'm truly hooked on applique. Maybe tonight I'll get to some quick pants for pre-school next week. In the meantime, here's the first piece for his 'fall collection'.

We'll layer this shirt over a long-sleeved shirt for cooler weather wear.

Not too scary  (=

I used my Silhouette cutter to cut out the monster shape. I've never done that before, and next time will use a little extra pressure on the cutting blade, but I'm ecstatic that it worked. I fused my fabric (a Christmas print turned sideways!) to some Heat and Bond Lite before sticking it to the cutting mat. I left the backing paper on Heat and Bond, and then removed the paper after the cut was finished and adhered to the t-shirt as usual. Then I zig-zagged around the edges, and added a couple red button 'eyes'. My son loves it, and I think this shirt will be great for Hallowe'en without being so themed that it can't be worn at other times, too.

Linked to:


Simpsonized Crafts

Thursday, September 9, 2010

Camo loungers

Well, as camouflaged as you can be with bright blue pants, I suppose. Yet another pair of loungers for my youngest and his ever-growing long legs that always seem to poke out of other PJ bottoms. These ones are soft fleece, perfect for the cooler weather.

a
Action shot -- I can't keep this kid still for even ten seconds!

I envision a lot more pants-making in my future, since none of my oldest's pants fit him and now that it's September, that's a problem! He's very tall and very skinny, so virtually nothing I can buy fits him. Good thing I love my sewing machine!

Pocket full of kisses

My oldest is going back to preschool next week after a full summer of being around me all the time. He's prone to separation anxiety, so I threw together this little project to remind him that his dad and I are thinking about him while he's in class.
When he opens his bag, he'll find a small photo of Mom & Dad and a pocket full of 'kisses and hugs' that he can tuck into his own pockets whenever he's feeling lonely at preschool. The pocket (back layer still attached so it functions as a pocket) is cut from an old pair of jeans, and I stitched a piece of clear vinyl over the top to protect the photo and keep it in place. I used my Silhouette to cut out the lettering on the photo, and a bunch of little X & O hugs and kisses (or is it kisses and hugs?) to put inside the pocket. The whole project was done in less than ten minutes, but I think it will really ease my son's transition into the routine of preschool. Linking up to: Visit thecsiproject.com Simpsonized Crafts

Sunday, September 5, 2010

More applique & a new toy for hubby

Hubby popped home with a MacBook Pro last week, and he's been absolutely smitten with it ever since. He even asked me to shave an apple logo into the back of his head to get a rise out of his Mac-hating boss. Ummm, no. I think not. So we compromised and came up with an appliqued t-shirt. He wanted something for work the next day and it was already midnight, so I had to use what I had on hand: craft felt. I'm not sure how durable this will be, but the logo got the reaction he was looking for, so hubby was pleased.

Isn't he cute?
Hope everyone is having a great long weekend of fun, family and crafting!

Friday, September 3, 2010

Cheesecake Cookie Cups

My good friend Chantal invited me over for a girls' night in last night. To celebrate the event (yes, our lives have gotten so busy with kids that an evening of watching television in peace now qualifies as an event), she made yummy mini cheesecakes with a cookie base and cherry topping. Here's a photo she snapped before we started eating. So pretty, and easy to make, too!


She found the recipe on a site called Very Best Baking. Check it out here! This recipe is definitely going in my keeper file.